
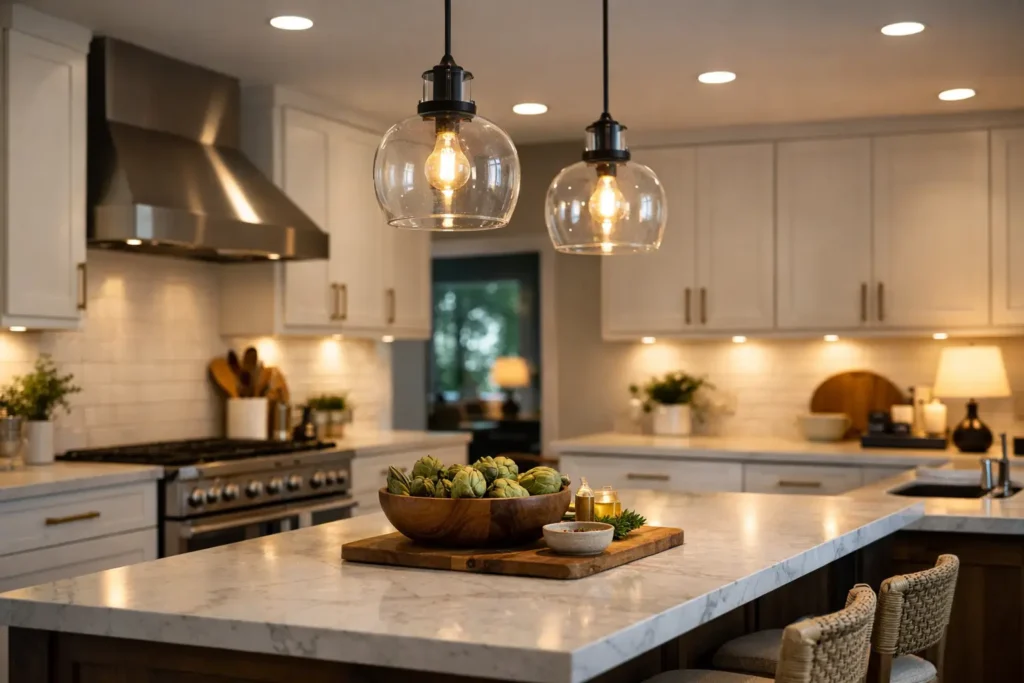
A kitchen can have beautiful cabinets, a well-built island, and new countertops, yet still feel unfinished when the lighting is wrong. The best kitchen lighting layers do more than make the room brighter. They make knife work safer, bring out the true color of finishes, create a welcoming place to gather, and give the space a finished, custom feel.
For most Long Island homeowners, lighting decisions come up once the kitchen layout is already taking shape. That is the right time to plan them. Fixture placement affects cabinetry, backsplash details, electrical work, ceiling conditions, and how comfortably the kitchen works morning through night. A good lighting plan is not about filling the ceiling with as many fixtures as possible. It is about putting useful light where you need it and comfortable light where you live.
Best Kitchen Lighting Layers Start With the Work
A well-lit kitchen generally uses three main layers: ambient lighting for overall visibility, task lighting for work surfaces, and accent lighting for depth and character. Decorative lighting often overlaps with those layers, especially over an island or dining area. Each layer has a job, and the room works best when no single fixture is expected to do everything.
Start with the kitchen’s daily routine. Where do you chop vegetables, unload groceries, help with homework, serve coffee, or sit down for dinner? Those activities should guide the plan more than a fixture photo from a showroom. A bright pendant may look great over an island, for example, but it will not replace the direct countertop illumination needed along the perimeter cabinets.
The best results come from planning lighting alongside the cabinetry and electrical layout. If you wait until the cabinets, trim, and backsplash are complete, there may be fewer clean options for hiding wires, adding switches, or locating fixtures exactly where they belong.
Layer One: Ambient Light for the Whole Room
Ambient light is the foundation. It gives you comfortable, even illumination when you walk into the kitchen and keeps the room from feeling dark in corners or along the perimeter. Recessed ceiling lights are a common choice because they are clean, practical, and easy to distribute across an open kitchen.
The key is placement. Recessed lights should be laid out to light the actual room, not simply arranged in a perfect grid. A centered grid can leave homeowners standing in their own shadow at the counters because the fixtures sit behind them. Positioning lights closer to the working edge of perimeter cabinets helps cast light onto the countertop rather than the back of the person using it.
Ceiling height, beam locations, and the size of the kitchen all matter. In a smaller kitchen, too many recessed lights can make the ceiling look busy and overly bright. In a large open-plan kitchen, too few can leave seating areas and walkways dim. The goal is balanced coverage with enough flexibility to lower the mood at night.
Flush-mount or semi-flush fixtures can also work well, particularly in kitchens with lower ceilings or a more traditional style. They are often a better visual fit than recessed lighting in a period home, but they still need support from task lighting at the counters.
Choose a Comfortable Color Temperature
For most kitchens, LED bulbs around 2700K to 3000K create a warm, inviting light while still keeping food prep areas clear. At the warmer end, the kitchen feels more relaxed and residential. At 3000K, white cabinetry and work surfaces tend to appear a little crisper.
Very cool lighting can make a kitchen feel harsh or give white cabinets a bluish cast. On the other hand, lighting that is too warm may make a bright, modern kitchen feel yellow. The best choice depends on cabinet color, natural daylight, and the overall look you want. Testing one fixture before committing to every bulb can prevent an expensive do-over.
Layer Two: Task Lighting Where You Prep and Cook
Task lighting is the layer homeowners notice every day. Under-cabinet lighting is usually the most valuable addition because it puts direct light on the countertop, where it belongs. It reduces shadows during food prep and makes the kitchen easier to use after dark without turning on every overhead light.
Low-profile LED strips or linear fixtures are typically installed beneath the upper cabinets, positioned toward the front edge rather than tight against the wall. That placement helps the light reach the full depth of the counter and limits dark bands near the cabinet face. A clean installation also keeps the fixture and wiring discreet, protecting the finished look of your cabinetry and backsplash.
Do not overlook work areas outside the main counter run. A pantry, coffee station, desk area, or sink may need its own light source. The sink deserves special attention. If it sits under a window, daytime light may be excellent, but evenings can be another story. A recessed light placed correctly in front of the sink, or a pendant in the right setting, can make cleanup much easier.
Inside-cabinet lighting is optional, but it can be worthwhile for glass-front cabinets, deep drawers, and tall pantry storage. It is not necessary in every remodel. If the budget calls for priorities, put money into under-cabinet task lighting first. It delivers more day-to-day value.
Layer Three: Decorative and Accent Lighting With a Purpose
Pendants over an island are often the visual centerpiece of a kitchen. They can bring texture, color, or a little contrast to a space with simple cabinetry. But scale and spacing matter more than choosing the trendiest shape.
A pendant that is too large can block sightlines across the room. One that is too small can disappear over a wide island. The number of pendants depends on island length, fixture size, and ceiling height. Two medium fixtures often suit a standard island, while a longer island may handle three smaller pendants or one substantial linear fixture.
Hang pendants high enough that people can see across the kitchen and move comfortably around seating. The exact height depends on the fixture and ceiling, but the bottom of the pendant should generally sit well above the countertop without feeling lost in the room. Before final installation, it is worth standing at the island, nearby sink, and adjoining room to check the view from each angle.
Accent lighting adds depth rather than raw brightness. This may include lighting inside glass cabinets, above upper cabinets, beneath an island overhang, or along open shelving. Used carefully, it gives the kitchen a layered evening look and highlights quality details such as custom millwork, tile, or a carefully finished range hood.
There is a trade-off. Too much accent lighting can quickly look busy or dated, especially if every cabinet edge is illuminated. Choose one or two areas that deserve attention and let the rest of the room breathe.
Put Every Layer on the Right Controls
The controls are what turn a collection of fixtures into a useful lighting system. Ambient, task, and decorative lights should usually be on separate switches. That way, you can turn on under-cabinet lights for an early morning coffee, use pendants while entertaining, or keep only soft accent lighting on after dinner.
Dimmers are worth including in most kitchen lighting plans. They make a bright work kitchen flexible enough for a quiet evening, and they help prevent glare from highly reflective countertops, stainless appliances, or glossy tile. Make sure the dimmer, bulb, and fixture are compatible. Not every LED bulb dims smoothly, and poor matches can cause flickering or buzzing.
Smart controls can be helpful for families who like scheduled lighting or voice control, but they are not required for a great kitchen. Simple, clearly labeled wall switches remain dependable and easy for everyone in the household to use. The best system is one that fits your routine, not one with the most features.
Avoid These Common Kitchen Lighting Mistakes
The most common mistake is relying on a single center fixture. It may brighten the floor, but it rarely provides enough light for the counters. Another frequent issue is placing recessed lights without accounting for upper cabinets, which creates shadows exactly where you prepare food.
Homeowners also sometimes select fixtures before confirming the ceiling height, island size, and cabinet layout. A fixture can look perfect on a display wall and feel completely different in a real kitchen. Finishes deserve a closer look too. Matte black, brass, polished nickel, and bronze each read differently against cabinet hardware, faucet finishes, and daylight.
Finally, do not treat lighting as an afterthought during a renovation. Adding a new circuit, moving a junction box, or opening a finished ceiling later costs more and creates more disruption. A coordinated plan protects the budget and produces a cleaner result.
Build a Kitchen That Works After Sunset
A kitchen should feel just as useful at 6 a.m. as it does when friends are gathered around the island at night. Thoughtful lighting makes that possible without overwhelming the room or distracting from the craftsmanship you invested in.
When planning a kitchen remodel, bring lighting into the conversation early, along with cabinetry, finishes, and appliance placement. A skilled renovation team can help you balance the look you want with the practical details that make the space easier to enjoy for years. That Guy Carpentry approaches each kitchen as a personal build, with careful planning and workmanship that supports how your family actually lives.