
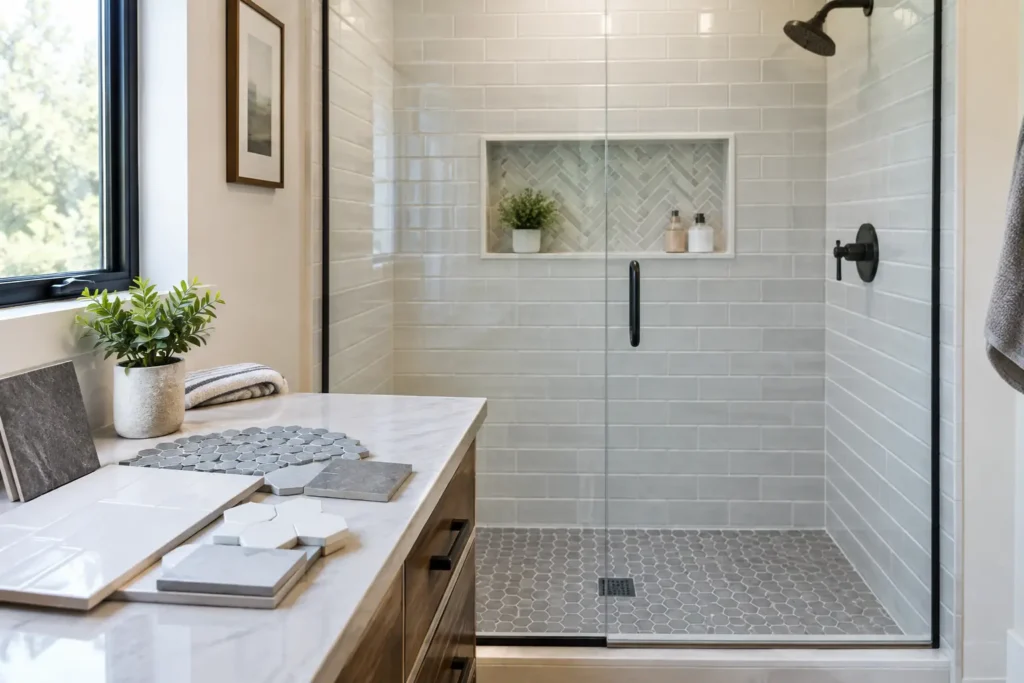
A shower can have beautiful tile and still look unfinished if the layout is not planned before the first piece goes on the wall. A skinny strip beside the door, a grout line that misses the niche, or a busy pattern on a small shower floor can pull attention away from otherwise excellent work. This shower tile layout guide helps you make the decisions that create a balanced, durable result.
Tile layout is about more than picking a pattern. It affects where cuts land, how easy the shower is to clean, how the room feels, and whether key features such as a niche, bench, window, or curb look intentional. The best plan is one that fits your tile, your shower dimensions, and the way you use the space.
Start With the Shower’s Fixed Features
Before choosing a layout, identify the features that cannot move: the drain, plumbing wall, shower valve, curb, door opening, window, bench, and recessed niche. These pieces should guide the tile plan rather than become problems to work around later.
A centered niche often looks best when it aligns with full tiles or grout joints. The same goes for a shower valve and trim plate. They do not always need to sit dead center on the wall, especially in an older home where plumbing locations may be fixed, but the surrounding tile should look balanced. Planning this on paper first can prevent a small, awkward tile cut from framing a feature you see every day.
Measure each wall separately. Shower walls are rarely perfectly square, and a tub surround may have slightly different dimensions at the top and bottom. Measure the width, height, niche opening, and floor area. Then measure the actual tile, not just the size printed on the box. A nominal 12-by-24-inch tile may be slightly smaller once manufacturing tolerances are considered.
Shower Tile Layout Guide: Find Your Starting Point
The most common layout mistake is starting with a full tile at one edge and accepting whatever cut is left at the other edge. That approach often produces a narrow sliver in a highly visible spot.
Instead, dry-lay the wall on paper or on the floor. Include grout joints in your calculations. Find the centerline of the main wall, then work outward in both directions. If that leaves two reasonable cuts at the corners, you have a strong starting point. If it creates one-inch pieces on both sides, shift the layout by half a tile or adjust the centerline until the cuts look more substantial.
On a feature wall, such as the back wall of a walk-in shower, symmetry usually matters most. Centering a tile or grout joint on the wall can make the space feel calm and deliberate. On side walls, the goal is often simpler: keep cuts consistent and avoid very narrow pieces near the front edge where they will be most noticeable.
Decide Where Full Tiles Matter Most
There is no single rule for every shower. Full tiles may belong at the top, bottom, center, or around the niche depending on the room.
For a shower with a highly visible ceiling line, it can make sense to use full tiles at the ceiling and place cuts low on the wall, where they are less obvious. In another bathroom, a level full tile above the shower pan or tub may look better, especially if it aligns with adjacent wall tile. If the floor is noticeably out of level, however, forcing a full bottom row can create tapered cuts above. A skilled installer will balance these conditions instead of treating one rule as universal.
The door opening is another priority. A clean, intentional cut at the shower entrance matters more than a perfectly centered pattern on a wall that is mostly hidden behind the shower door.
Choose a Pattern That Suits the Space
Large-format rectangular tile creates a clean, modern look with fewer grout lines. It can make a modest shower feel more open, but it also requires flatter walls and careful planning around corners, niches, and fixtures. A 12-by-24-inch tile installed horizontally often makes a narrow shower appear wider. Installed vertically, the same tile can emphasize ceiling height.
Stacked tile gives the room a crisp, contemporary look because grout lines run in straight rows. A running bond, where each row is offset, feels more traditional and can soften the appearance of rectangular tile. It does require attention to the tile manufacturer’s offset recommendation. Many large-format tiles have a slight natural bow, and a 50 percent offset can make uneven edges more visible. A one-third offset is often a safer choice.
Herringbone, chevron, and other patterned layouts bring character, especially on a feature wall or niche back. They also involve more cuts, more material waste, and more time. That does not make them a poor choice. It simply means the budget and installation plan should reflect the added detail.
If your bathroom already has patterned flooring, dramatic wallpaper, or a busy vanity top, a quieter shower layout may give the room better balance. If the rest of the space is simple, a carefully tiled shower wall can become the focal point.
Plan the Shower Floor Around Drainage
Shower floor tile has a job beyond appearance: it must follow the slope toward the drain without creating lippage, or raised tile edges that catch your feet. Small mosaic tile is popular because its many grout joints allow it to follow the pitch of the floor more naturally.
For a centered point drain, square mosaics, hexagons, penny rounds, and small basketweave patterns can all work well. With a linear drain at one end of the shower, larger tiles may be possible because the floor slopes in one direction rather than toward a central point. The waterproofing method, drain style, and tile selection need to work together from the start.
Avoid choosing a polished, slick floor tile solely because it matches the walls. Shower floors need dependable traction when wet. A matte or textured mosaic is generally a more practical choice for a family bathroom.
Keep the floor layout intentional, too. Center a mosaic sheet or a grout joint at the drain when possible, and avoid tiny perimeter cuts. The cut tile at the wall should look consistent around the floor rather than random.
Treat the Niche, Bench, and Curb as Part of the Layout
A niche is one of the first places homeowners notice when stepping into a shower. Its height should be practical for the products you use, but its position should also fit the tile grid. Whenever possible, set the niche size so full tiles or even cuts frame it. A niche that interrupts a large tile in an awkward spot can make a premium tile installation look less refined.
Consider using the shower floor mosaic on the back of the niche for contrast. This can add detail without committing the entire shower to a bold accent tile. If you use an accent, confirm that its thickness works with the field tile. Different tile thicknesses can require careful adjustment so the finished surfaces stay flush.
Benches and curbs need the same attention. Their top surfaces should slope slightly toward the shower so water does not sit against the wall. Large-format pieces can create a clean cap, while smaller tile may be better when the design calls for a wrapped pattern. Either way, avoid placing grout joints where they will collect water or be difficult to maintain.
Think About Grout Before Installation Day
Grout color changes the entire layout. A close match to the tile creates a quieter, more continuous surface. A contrasting grout makes every tile and every cut more visible, which can be striking in a simple pattern but less forgiving of an uneven layout.
Use grout joints sized for the tile and the manufacturer’s recommendation. Tight joints can look sleek, but they require precise tile sizing and careful installation. Natural stone and handmade-style tile often need wider joints to accommodate variation. At changes of plane, such as wall-to-wall and wall-to-floor corners, flexible sealant is typically used instead of rigid grout to allow for normal movement.
Just as important, tile is not the waterproofing system. A shower needs a properly prepared, waterproof substrate behind the finish material, with correctly detailed seams, corners, penetrations, niche, and drain connection. A beautiful layout cannot make up for shortcuts behind the wall.
Let the Layout Support the Whole Bathroom
The best shower tile plan relates to the rest of the room. Aligning a wall grout joint with the vanity, window, or bathroom floor can create a subtle sense of order. It is not necessary to force every line to match, especially when existing framing or plumbing makes that impractical, but these visual connections are worth considering during design.
For Long Island homeowners updating an older bathroom, layout planning is especially valuable because walls and floors may reveal surprises once demolition begins. A contractor who measures carefully, checks the condition of the structure, and reviews the layout before setting tile can make adjustments early, when they are manageable.
That Guy Carpentry approaches bathroom remodeling with that kind of practical planning: listen to how you want the room to look and function, then build the details correctly from the ground up. Bring tile samples, inspiration photos, and the products you use every day to the planning conversation. The right shower layout should not only look good when the project is finished. It should make every morning in the room feel considered, comfortable, and built for your home.