
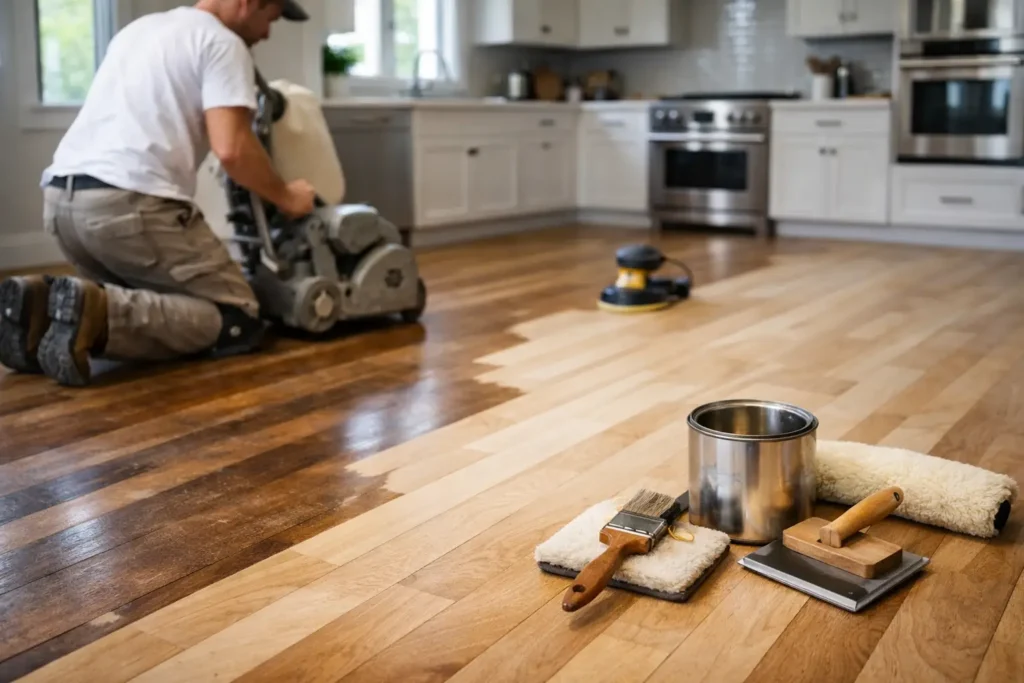
A hardwood floor can look worn out long before it is truly worn through. Surface scratches, dull traffic paths, faded color near windows, and a finish that no longer cleans up well can often be corrected without replacing the floor. Knowing how to refinish hardwood floors helps you decide whether this is a realistic weekend project or a job better handled by an experienced flooring and carpentry team.
Refinishing is not simply putting a new coat of polyurethane over old boards. The lasting result comes from careful preparation, even sanding, clean conditions, and giving each coat enough time to cure. Rushing any one of those steps can leave swirl marks, rough spots, uneven sheen, or a finish that fails too soon.
First, Make Sure Your Floor Can Be Refinished
Most solid hardwood floors can be sanded and refinished several times over their life. Oak, maple, ash, hickory, and similar solid wood floors are generally good candidates, provided the boards are still stable and thick enough.
Engineered hardwood requires more caution. Its top layer is real wood, but that wear layer may be too thin for a full sanding. Some higher-quality engineered floors can be lightly refinished, while others should only be screened and recoated. If you are unsure what type of flooring you have, do not start with a drum sander. A test area or professional evaluation can prevent an expensive mistake.
Look for issues that refinishing alone will not solve. Deep pet stains, black water marks, loose boards, major gaps, cupping, buckling, and termite damage may need repair or board replacement first. In older Long Island homes, uneven subfloors and previous patchwork can also affect how the finished floor looks. Good workmanship means addressing the cause of the problem, not sanding over it and hoping for the best.
How to Refinish Hardwood Floors Step by Step
Clear and protect the room
Remove furniture, rugs, curtains close to the floor, and anything hanging on nearby walls that could collect dust. Take off shoe molding if possible, labeling pieces as you go so they can be reinstalled neatly later. Cover doorways, vents, and openings to adjoining rooms with plastic sheeting, but maintain proper ventilation for the products you will use.
Dust is part of floor refinishing, even with modern dust-collection equipment. Protecting the rest of the house at the beginning saves a great deal of cleanup later. If the project affects several rooms, plan a temporary route through the home before work starts.
Clean, inspect, and make repairs
Vacuum thoroughly and clean the floor with a product suitable for hardwood. Wax, grease, silicone-based cleaners, and household residue can interfere with a new finish, so the floor must be genuinely clean before sanding or recoating.
Set protruding nails, secure loose boards, and fill small cracks or nail holes with a wood filler that matches the species and will accept stain if you plan to change the color. Replace boards that are damaged beyond repair. For a natural-looking repair, replacement pieces should be selected and blended with attention to grain direction, width, and surrounding color.
Sand with the right equipment and grit sequence
For a full refinish, professionals typically use a drum or belt sander for the main floor area and an edge sander around the perimeter. These machines remove the old finish and level minor wear, but they can also cut grooves into the floor in seconds when used improperly.
Start with the least aggressive grit that will remove the existing finish. A heavily worn floor may need a coarser first pass, followed by medium and fine grits. A floor with only light wear may need less aggressive sanding. Work methodically with the grain when practical, keep the sander moving, and overlap each pass consistently.
The edges deserve the same care as the center of the room. An uneven sanding pattern is one of the most common signs of a rushed job: the perimeter looks lighter, the middle looks duller, or visible lines appear when sunlight hits the floor. After the final sanding pass, vacuum the floor, walls, windowsills, and trim in detail. Then vacuum again. A clean surface is essential to a smooth finish.
Choose stain carefully, or keep the natural wood color
Stain is optional. Many homeowners prefer the natural warmth of oak or maple and apply a clear finish only. Others choose a darker tone to coordinate with updated cabinets, trim, or furniture. Dark stain can look rich and dramatic, but it also tends to show dust, scratches, and sanding imperfections more readily than a natural or medium tone.
Always test stain and finish on a sample board or an inconspicuous area. Wood species, age, prior sun exposure, and sanding quality all affect color. A stain that looks perfect on a store sample may look entirely different in your living room at 2 p.m. with direct sunlight coming through the windows.
Apply a durable finish in thin, even coats
Water-based polyurethane dries faster, has less odor, and generally stays clearer over time. Oil-based polyurethane adds a warmer amber tone and can offer a traditional look, but it has a stronger odor and longer drying time. Both can perform well when applied correctly.
Use the applicator recommended for the product, maintain a wet edge, and apply thin, even coats. Thick coats do not create a tougher floor. They are more likely to dry unevenly, trap debris, or show lap marks. Most systems require multiple coats, with a light buffing or screening between coats when directed by the manufacturer.
Keep foot traffic, pets, and airborne dust out of the room while the finish dries. Dry to the touch is not the same as cured. Follow the product instructions before replacing furniture, laying rugs, or allowing normal use. Protecting a new finish during its early curing period makes a real difference in how it holds up.
When a Screen and Recoat Is the Better Choice
Not every dull floor needs to be sanded down to bare wood. If the finish is worn but the wood itself is not deeply scratched, stained, or damaged, a screen and recoat may restore the appearance with less disruption. This process lightly abrades the existing finish and applies a fresh protective coat.
It is often a smart option for floors that have lost their shine in high-traffic areas but still have a sound, intact finish. It cannot remove deep scratches, change the stain color, or correct boards with water damage. It also will not work over certain waxed or contaminated surfaces without proper preparation.
Common Refinishing Mistakes to Avoid
The biggest mistake is treating the job as a quick cosmetic fix. Floor refinishing is detail work, and the details show every day once the room is back in use. Avoid skipping grits, sanding too aggressively at board edges, applying finish over dust, or putting furniture back before the floor has cured.
Homeowners also sometimes overlook moisture. If a basement is damp, a dishwasher has leaked, or a doorway allows rain to reach the flooring, correct that issue before refinishing. A beautiful new finish cannot stop boards from moving when the underlying moisture problem remains.
Be particularly careful with older homes. If you suspect lead-based paint in adjacent trim or have an unknown coating on the floor, use appropriate safety procedures before disturbing those surfaces. Proper containment, cleanup, and ventilation protect your family as well as the project.
When It Makes Sense to Call a Professional
A do-it-yourself refinish can work well for a small, open room with solid wood flooring and modest wear. The calculation changes when the floor has intricate borders, multiple connected rooms, heavy staining, repairs, old finishes, or expensive wood that cannot easily be replaced.
Professional refinishing also makes sense when your household cannot be without key rooms for several days. A skilled team can coordinate repairs, sanding, staining, finishing, trim work, and cleanup with less disruption and better control over the final result. For homeowners planning a larger renovation, refinishing floors alongside painting, new trim, kitchen work, or custom carpentry can also create a more consistent finished look.
At That Guy Carpentry, we approach flooring the same way we approach every home improvement project: with careful preparation, honest recommendations, and attention to the details that make the finished space feel complete. Whether your floor needs a light refresh, board repairs, or a full transformation, the right plan starts with understanding what is beneath your feet.
A refinished hardwood floor should not look freshly covered up. It should look like the best version of the wood that was there all along – warm, durable, and ready for the life that happens in your home.